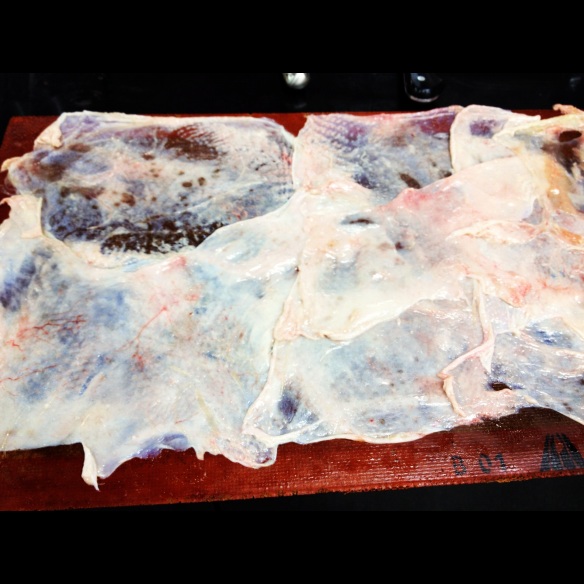
If you like fried chicken, or a good roast chicken, and if you share my tastes, I bet you love eating the skin. Its crispness is a sublime mouth sensation, and depending on what type of oil you use when frying, or what you add to the butter or olive oil you use to baste the bird while it is roasting, the flavors of the skin can range widely. (Duck fat? Olive oil/butter mixture? Garlic, shallots, basil, sage, chili powder? The sky is the limit.)
One of the things I learned to do at Restaurant Amador is use the skin alone to make chicken-skin wafers, or chips. (You can ask your butcher to order chicken skins for you, or learn how to skin your own chicken, as it’s really not that difficult. And the skins freeze well, so there is no excuse for not having any on hand.)
What you’ll need: A Silpat or two, a large metal baking sheet, two baking dishes of similar size, some heavy stones, and parchment paper.
To begin, take a chicken skin and spread it on a cutting board, skin-side down. Then, using a flat, flexible plastic scraper – you can buy these at a cooking-supply store, or make your own – scrape as much of the fat away from the skin as you can. (Have a container near you to scrape the fat into.) You’ll find it impossible to scrape away all of the fat, but get as much as possible without stressing over it. (The less fat, the lighter the taste.) Then, one piece at a time, spread the de-fatted skins, skin side down, on a Silpat, stretching them as much as possible. Repeat this until you have the Silpat covered, making sure to not overlap the skins too much; you want the layer to be as thin as is possible.
Repeat the scraping procedure with another set of skins – and don’t worry, this is a fast procedure … once you get going you can de-fat one piece in less than a minute – and, one at a time, spread a skin over the pieces already on the Silpat. Only this time, make sure to put the pieces skin side up. Making sure that the layers are uniform, cover the first layer completely.
The next step is easy: take your other Silpat and place it on top of the chicken skins, then put the assemblage on a baking sheet. Put the baking sheet on the bottom of one of the containers, (the space created by the inverted container helps crisp the skins). Place a piece of parchment paper on top of the Silpat, and on top of the paper put your other baking dish. (The dish needs to be large enough to cover the entire surface of the Silpat sheets.) Into this dish go the stones, which serve to exert pressure on the skins.
(Do not fret if you don’t have metal pans like the ones in the photo above; improvise with what you have. But do invest, if you have not already, in Silpats; you’ll find yourself using them often.)
With the oven set at 330 Fahrenheit (165 Celsius), put the entire stack on a rack and cook for two hours. Your kitchen will develop a lovely scent.
Next, take the tray containing the stones out of the oven and put it in a safe place, as the stones will retain their heat for a long time. Remove the remaining trays from the oven and put the Silpat sheets on a counter. Slowly peel back the top Silpat and behold your creation: you will discover a crisp, flat layer of chicken skin, with uneven edges. (If you have a food dehydrator, now is the time to dry out your skin. If you don’t, put the skin on a piece of parchment paper and bake it in your oven at a very low temperature, say, 70 degrees Fahrenheit. This step helps give the skin a lighter taste and feel. Leave it in the oven for 30 minutes or so.)
Finally, it’s time to cut the skin into individual pieces; feel free to use your imagination here, depending on how you plan to use the pieces.
At Amador, the skin is cut into rectangles and served as an early course, adorned with purées, creams and herbs. They are delicious. Just take the skins from the oven and place them on a cutting board. Using a sharp knife – of course, you should have nothing but sharp knives – cut the pieces into your desired shape. As a final step, sprinkle with Maldon salt, or your preferred sea salt. You could serve them in many ways, and I know they would be good as a garnish on a bowl of shrimp and grits, perhaps sprinkled with dried shrimp.


I do recall the joy of eating the skin first. It was such a simple and lovely time.